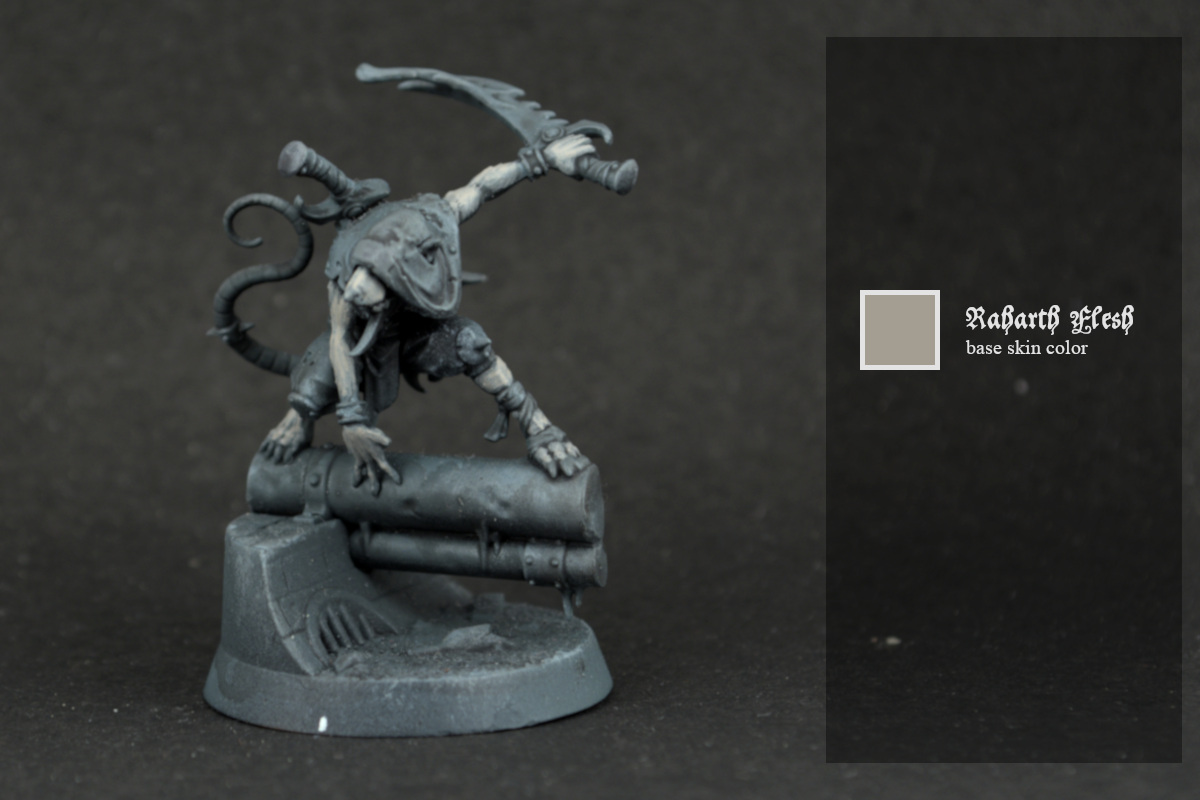
Having returned to the Sisters of Sigmar after a longer break, I decided to write down my painting process so that future returns would be easier. I’m putting this list together mainly for myself, though I also hope it might be useful to someone else :) The model is the Sister Superior #4 Kitbash I've finished lately. Enjoy!
Powróciwszy po dłuższej przerwie do składania i malowania Sióstr Sigmara, postanowiłem skodyfikować proces malowania, żeby kolejne powroty były łatwiejsze. Rozpiskę robię więc przed wszystkim dla siebie, choć mam zarazem nadzieję, że ktoś skorzysta :) Obrazki wydają mi się zrozumiałe same przez się, więc - standardowo już dla tutoriali tego rodzaju - dodatkowe lanie wody zostawiam tylko po angielsku, żeby bloki tekstu nie przytłaczały objętością.

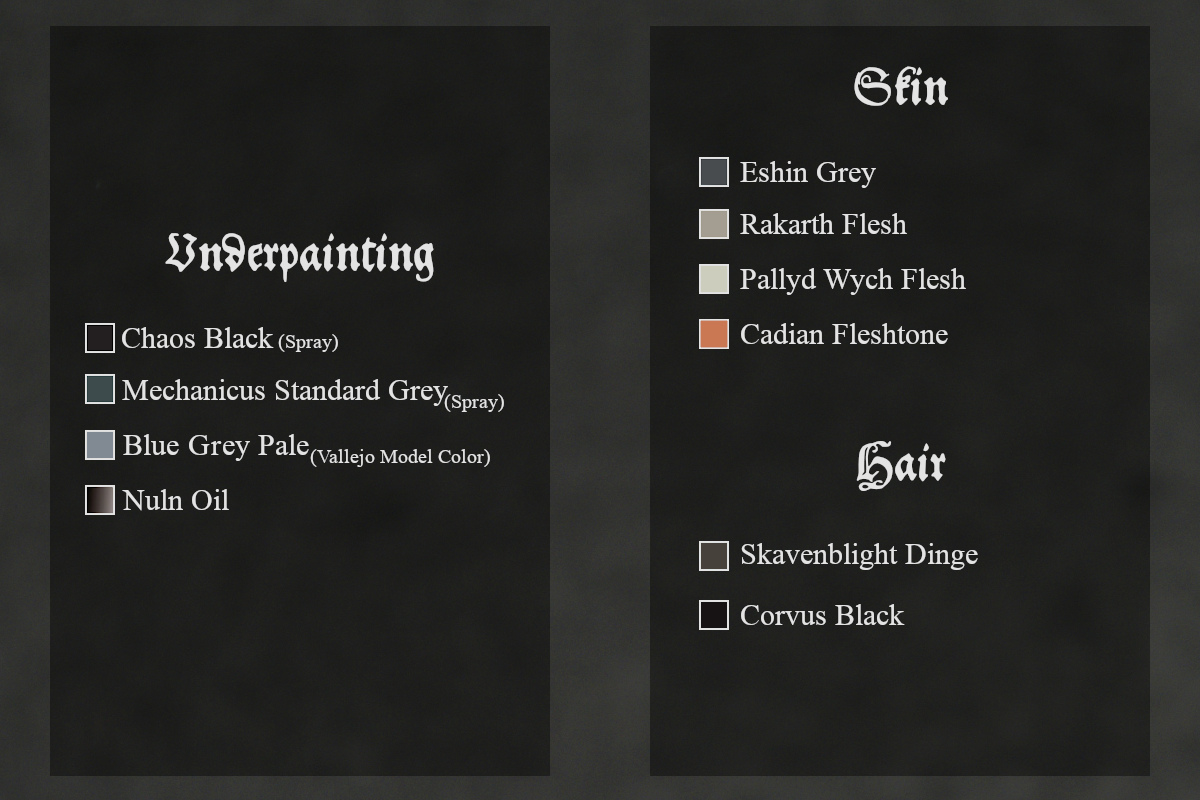
Underpainting
- I prime the mini black using Citadel Chaos Black Spray.
- When it cures, I spray the mini with Citadel Mechanicus Standard Grey from a 45-degree angle.
- When it's dry, I drybrush the mini from up to down with Vallejo Model Color Blue Pale Grey.
- Finally, I wash it with Two Thin Coats Oblivion Black Wash.

Paints and techniques used
- when painting leather, I stipple the elevated areas with dots and scratchy lines;
- when painting fabrics, I stipple with dots;
- when painting metal, I use metallic paints in places where the light would reflect off.

Grimdark Sisters of Sigmar Step-by-Step Painting Tutorial

At this stage I use an old brush with a little paint (similarly to drybrushing) for it.


To make transitions on skin smoother, I cover previously highlighted areas of skin with a glaze made of diluted Bugman's Glow.

when stippling with colors as bright as Pale Sand / Off-White mix.

")
.jpg "Mordheim Witch Hunters - Witch Hunter Captain - Galen Van Denst (back)")


.jpg)